How to connect MAKE with Flow Webhooks
Use case overview
This setup connects your post-purchase email workflow in MAKE with Flow Webhooks so you can collect customer details for a Monthly SEO Audit and pass them into Shopify Flow.
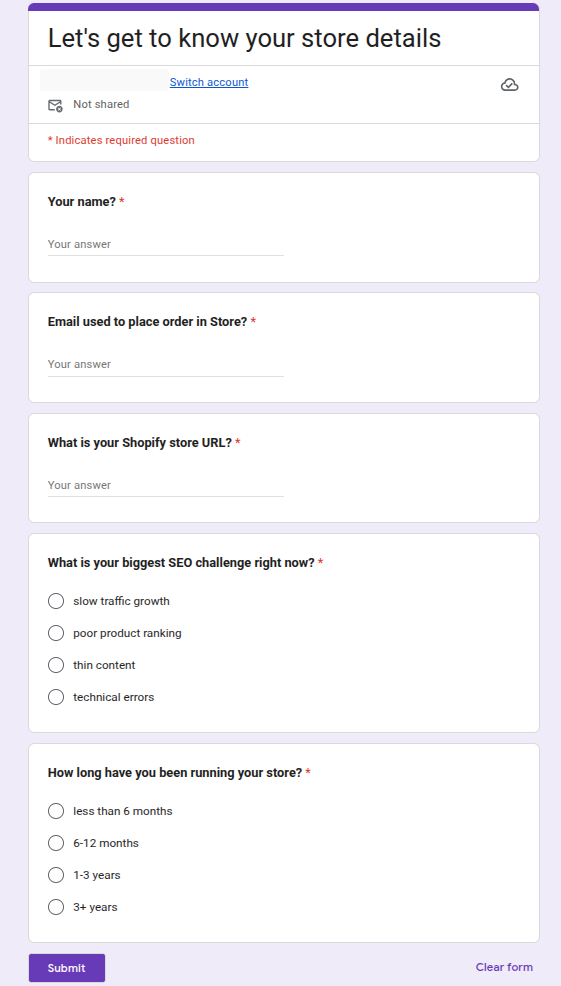
In this example, the customer receives an email with a survey form (we are using google form, google form is adding entry in the google spread shhet) asking for:
What is your Shopify store URL?
What is your biggest SEO challenge right now? with these options:
slow traffic growth,poor product rankings,thin content,technical errorsHow long have you been running your store? with these options:
less than 6 months,6–12 months,1–3 years,3+ yearsEmail used for order at Store?
When the customer submits the form, MAKE sends the answers to your Flow Webhooks endpoint. Shopify Flow can then tag the customer and add a note so your SEO team sees the context immediately in Shopify admin.
What this workflow does
After the customer submits the form in your email flow, data is added in the spreadsheet and from where MAKE sends the data to the flow webhook and the webhook sends this payload into Shopify Flow:
{
  "name": "Saad",
  "email": "[email protected]",
  "store_url": "mystore.myshopify.com",
  "challenge_and_store_age": "thin Content | 1-3 years"
}
Your Shopify Flow workflow then:
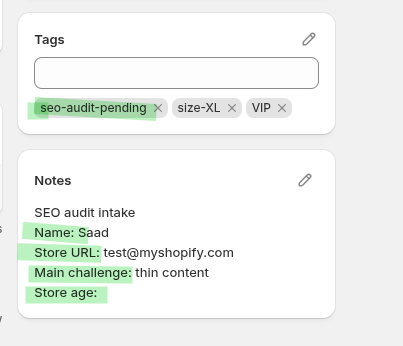
adds the customer tag
seo-audit-pendingadds a customer note with the store URL and SEO challenge
This makes it easy for your team to open the customer record in Shopify admin and see what needs attention before the audit starts.
Video Guide
Here you can see the video of whole setup, video has no voice. You can increase or decrease the speed of video according to need.
In the end, when I submitted the form, trigger was not working in the MAKE so I replayed the existing event and also we got an error in the flow, regarding the customer id in STEP (add tag to customer), I also fixed that.
Before you begin
Install and enable Flow Webhooks in your Shopify store.
Have a Shopify Flow workflow ready, or create a new one in Shopify Flow.
Build your intake form in the tool that feeds your MAKE workflow. I am using the google form, once the google form is submitted and entry is created in the google spread sheets.
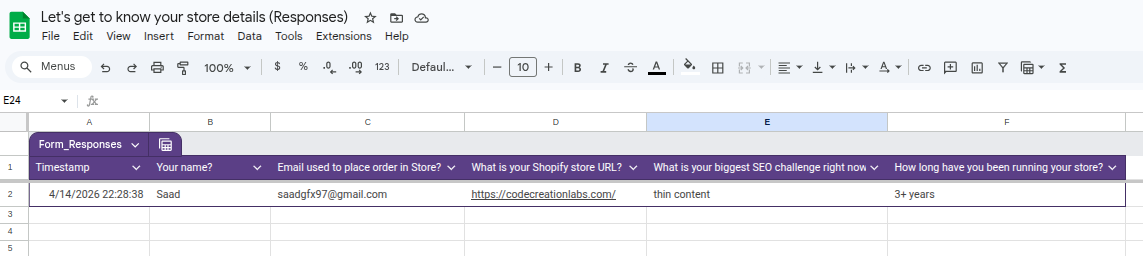
data received from the google form in spread sheet
Make sure you are collecting the customer email address exactly as it exists in Shopify so Flow can identify the correct customer.
Set up the connection
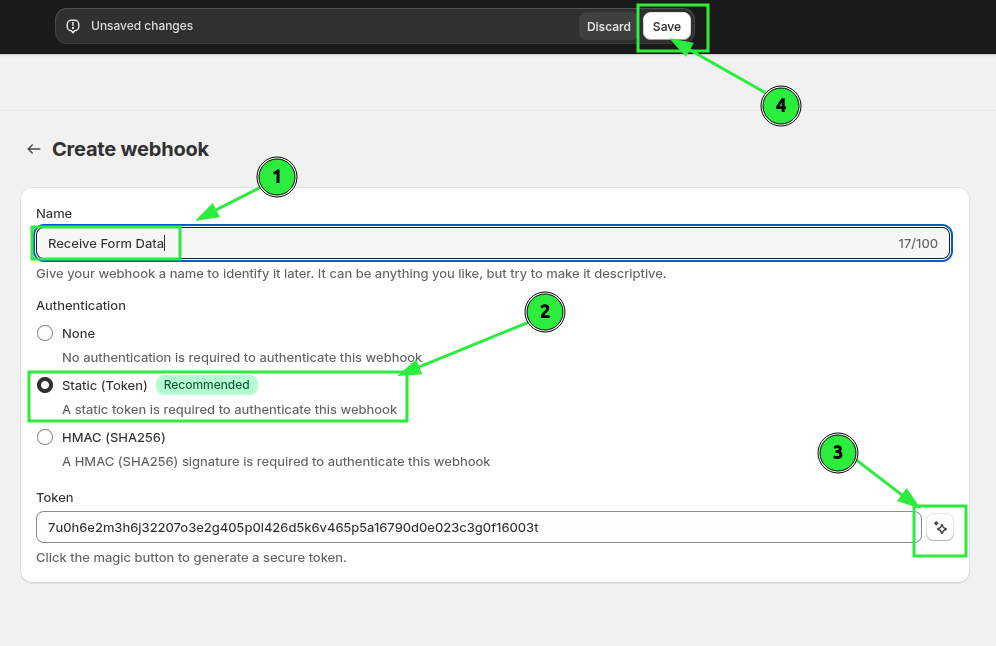
In Flow Webhooks, create the webhook.
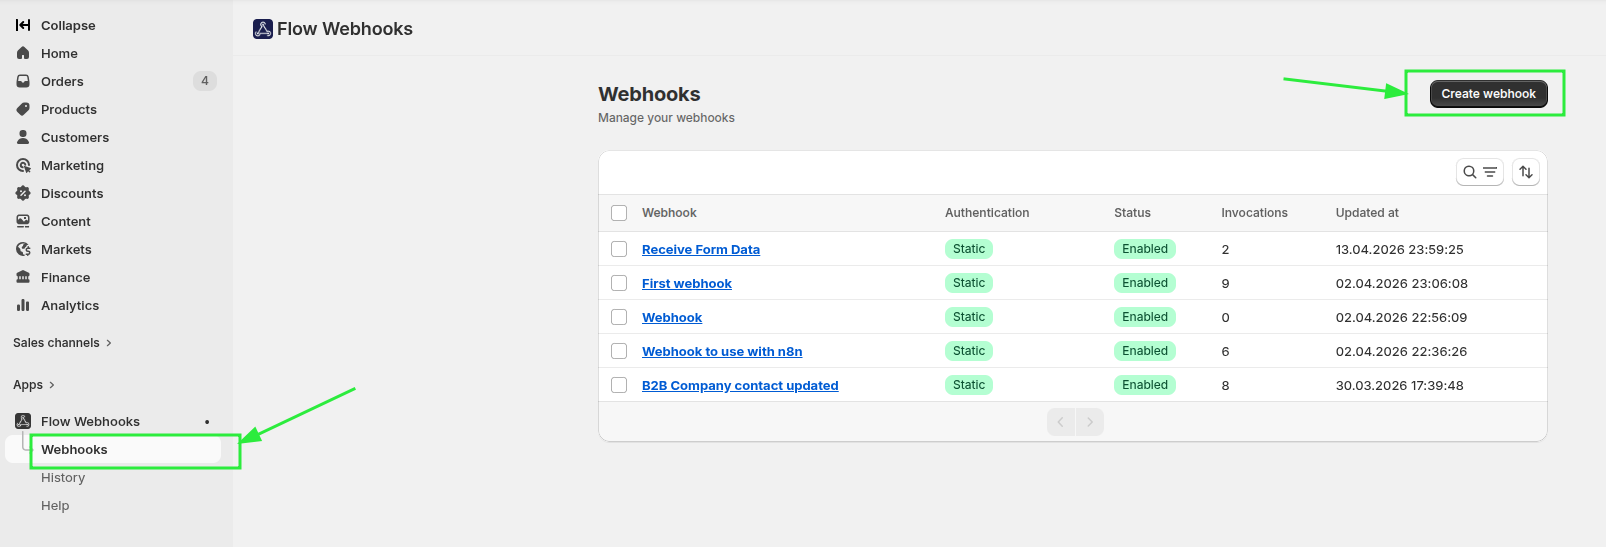
Enter name and generate static token (you can create the static token instantly pressing the magic button on number 3 in following image) and save.
In the Advanced Settings name the variables you want to receive:
nameemailstore_urlseo_challengestore_age

In the seetings we have 4 variables, that we have mapped to name, email, store_url and seo_challenge then we have also checked the option Allow Custom Request Body to receive other information like store_age.
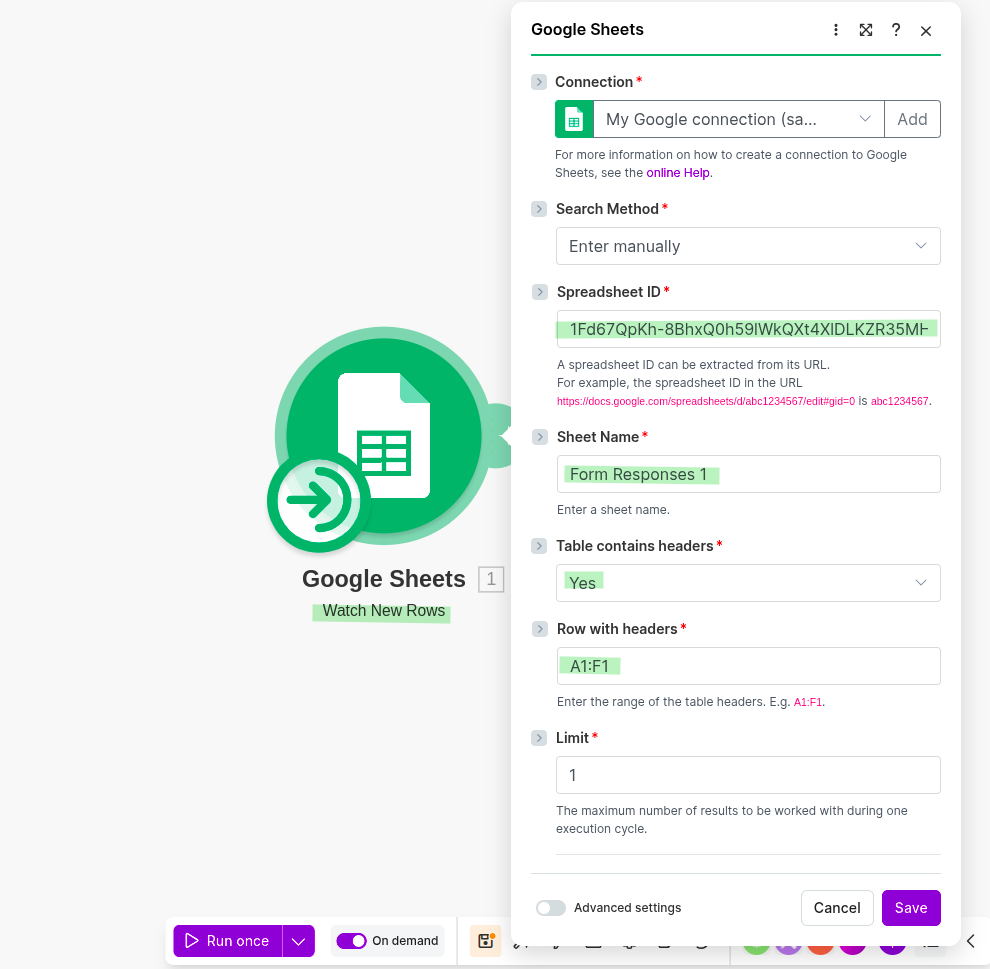
In MAKE, select the google sheet trigger (watch new row), select the correct sheet you want to monitor and run once and if the connection is successful, save the scenario.
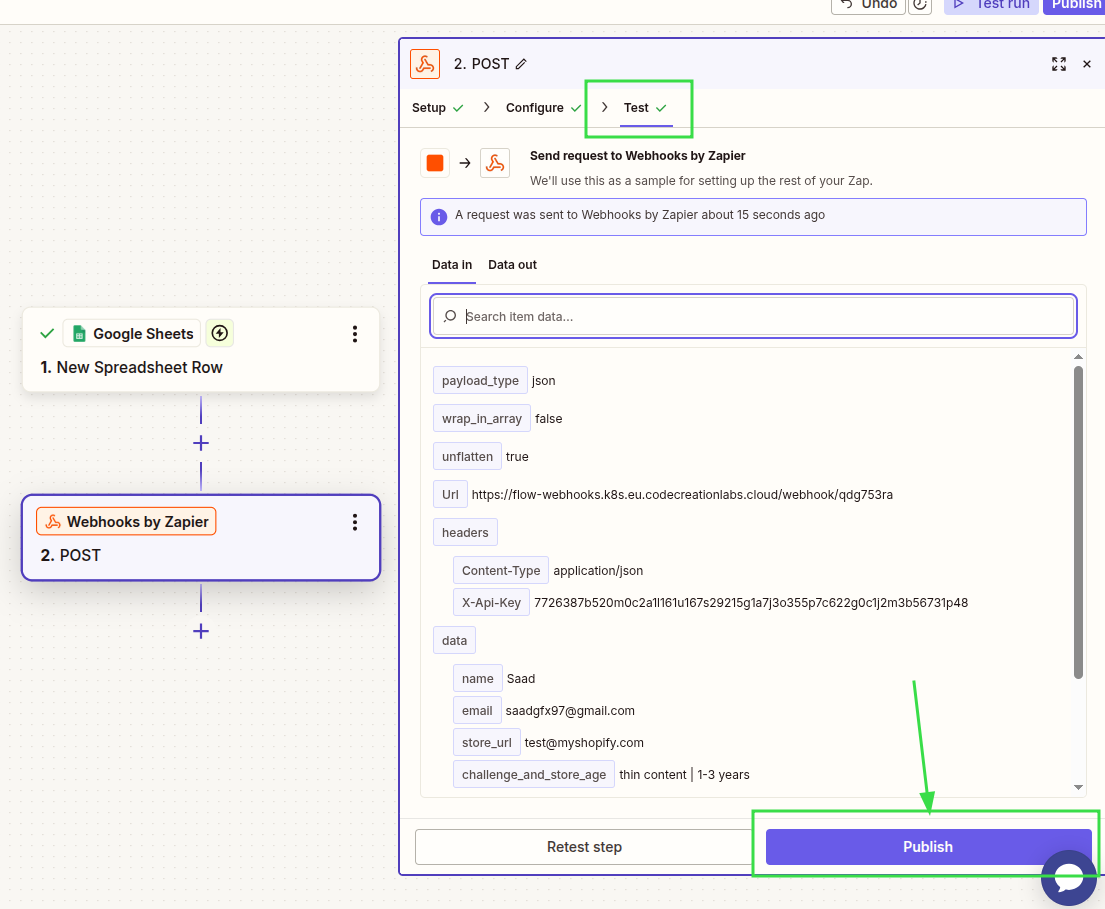
Then select the HTTP -> make a request in MAKE to send the form data to the webhook you have created using the Flow Webhooks app. In the action event select POST METHOD, enter URL, add headers. (Authentication type should be no authentication)
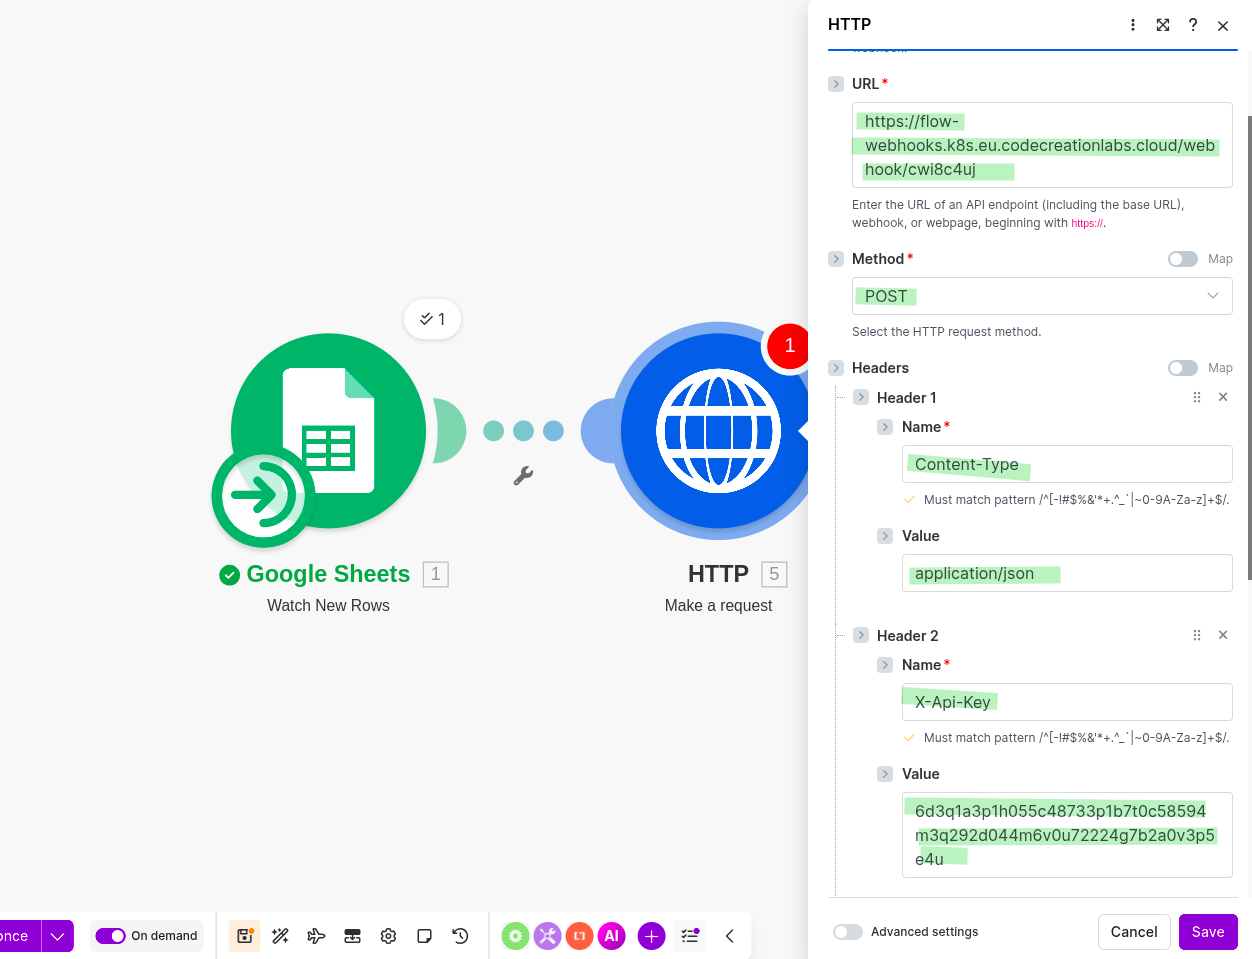
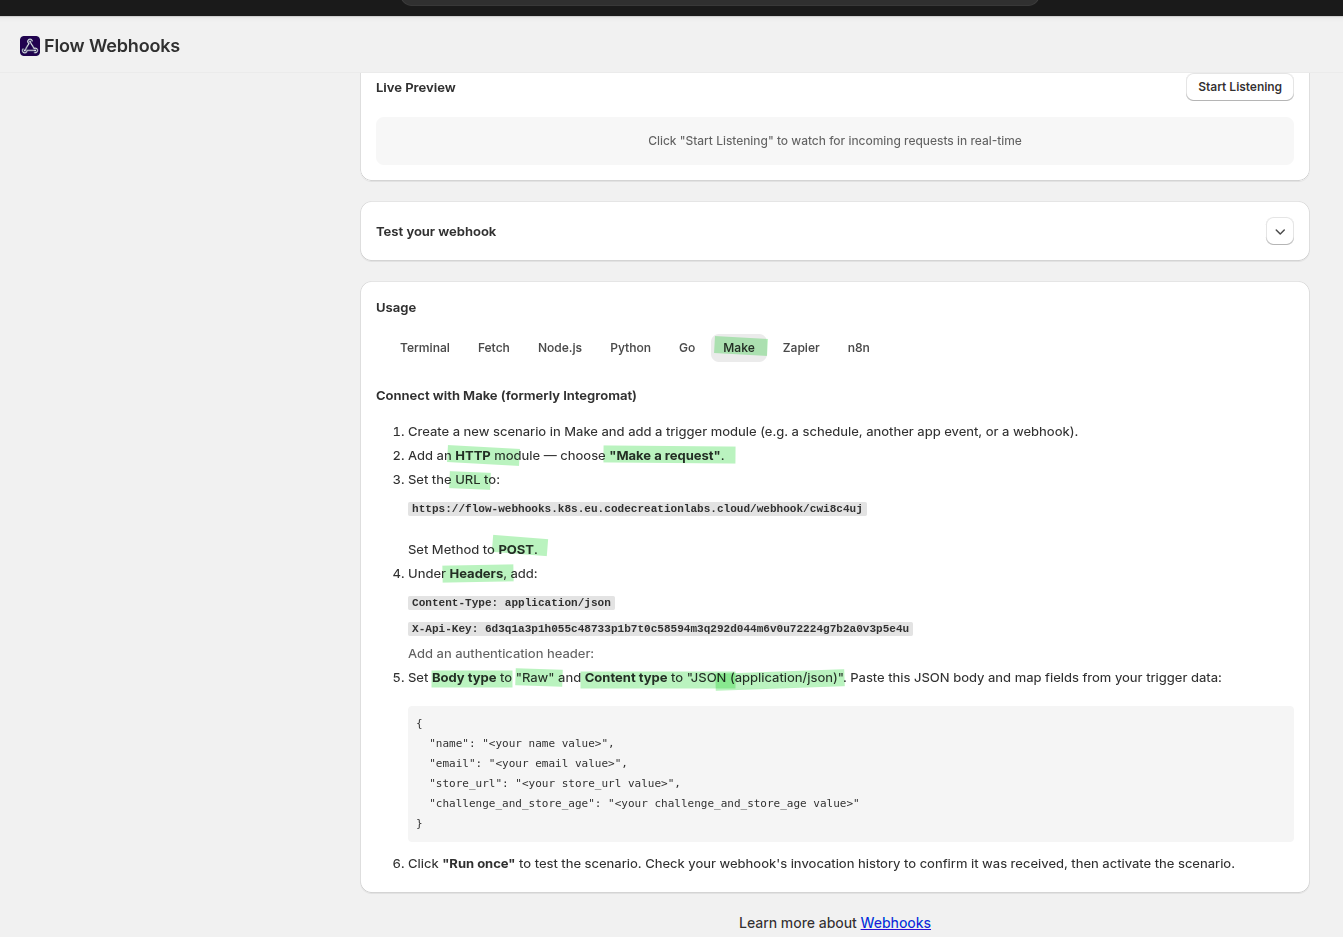
You can follow the step mentioned at the bottom of the flow webhook with mapped fields, API token and URL for webhook.
Then you can map the data as following.
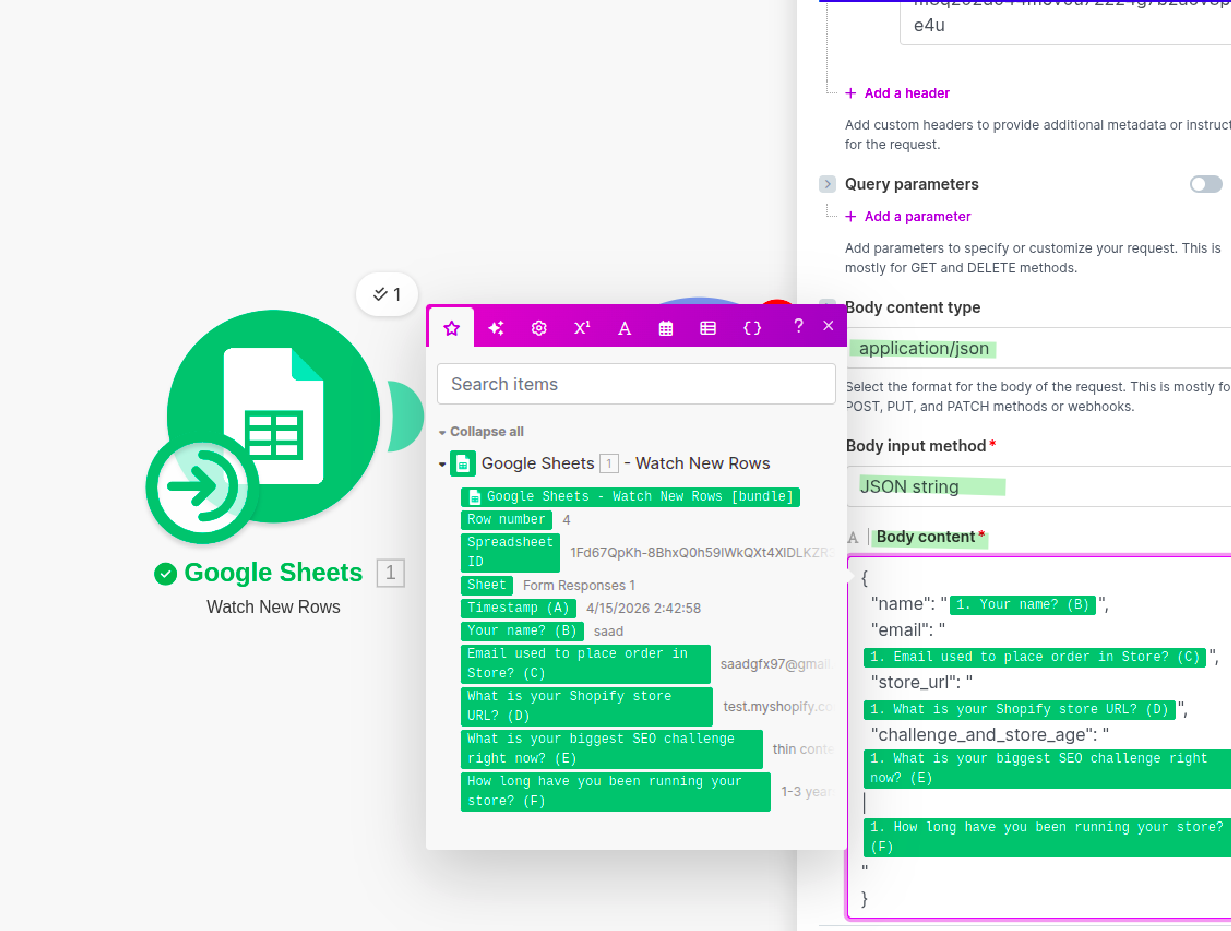
Then save and run once.
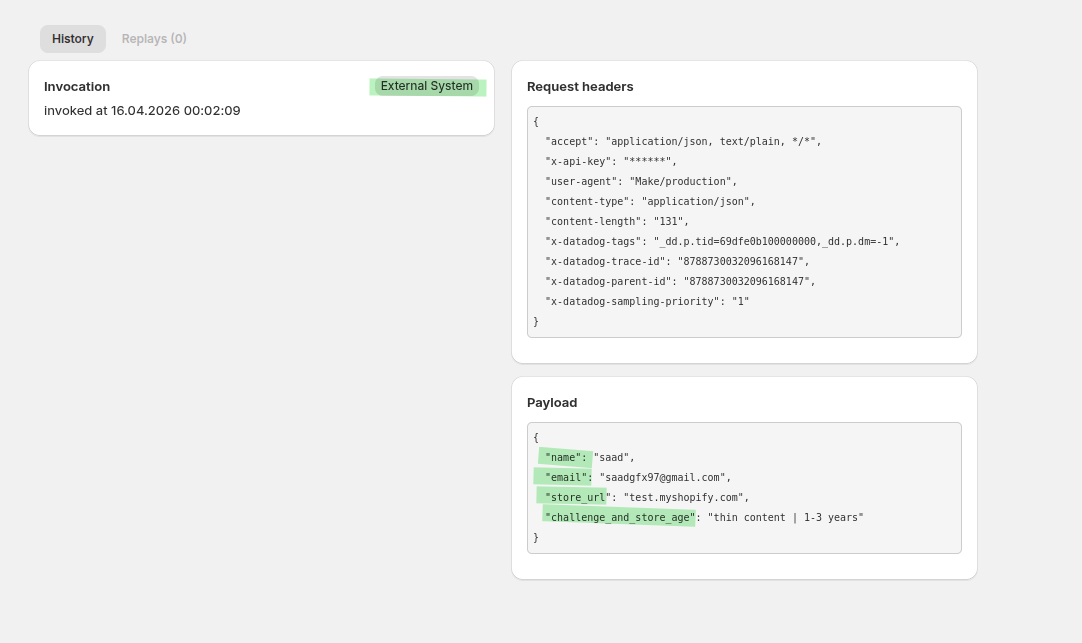
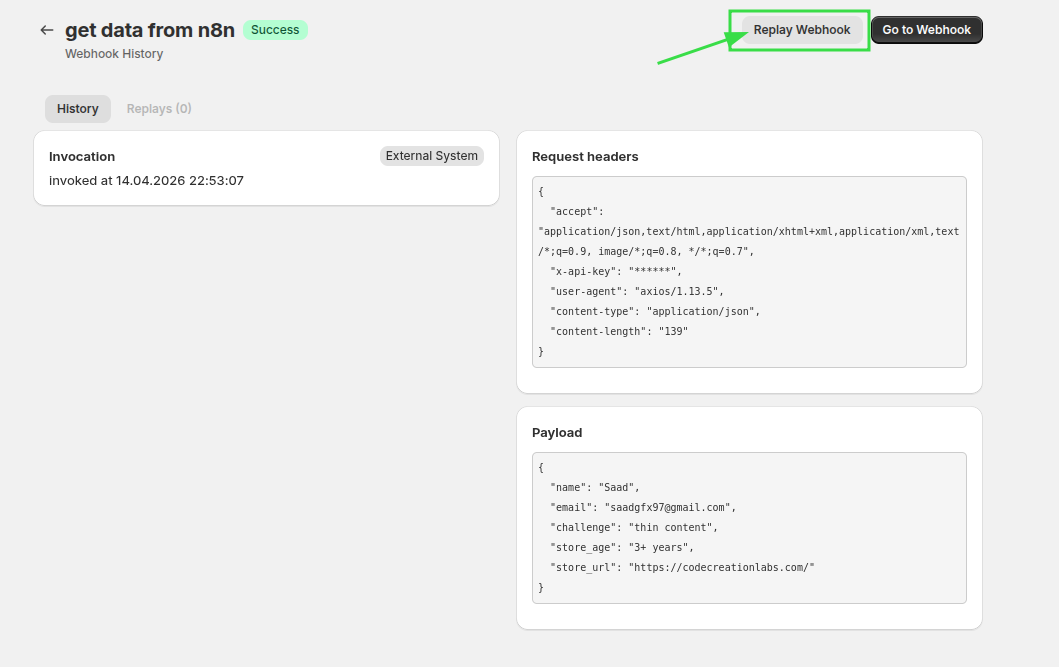
In the invocations, you can see the External System invoked this webhook and also see the payload. You can use this payload in your Shopify flow to perform any action.
In Shopify Flow, create a workflow that starts when your webhook data is received through Flow Webhooks. Then in webhook trigger, hit Record Events.
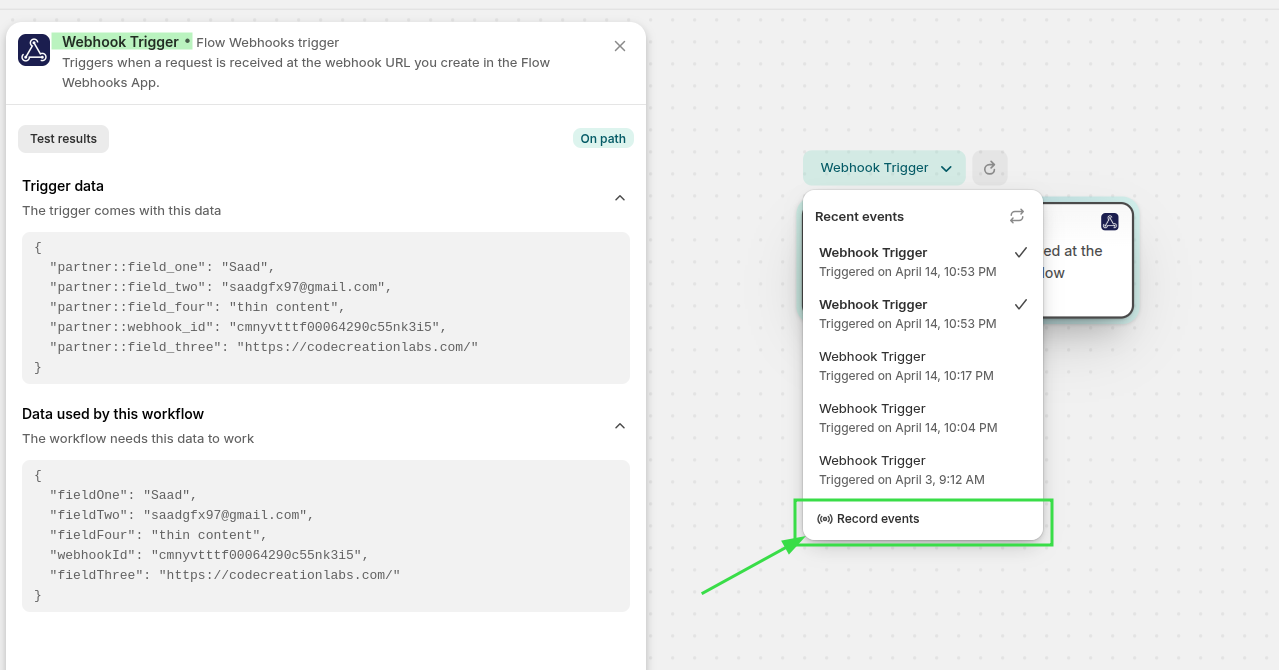
Now go to the earlier webhook invokation and Replay the Webhook to send this payload to your Webhook Trigger in the Shopify Flow.
Now in the data, you can see the payload and also the webhook ID.
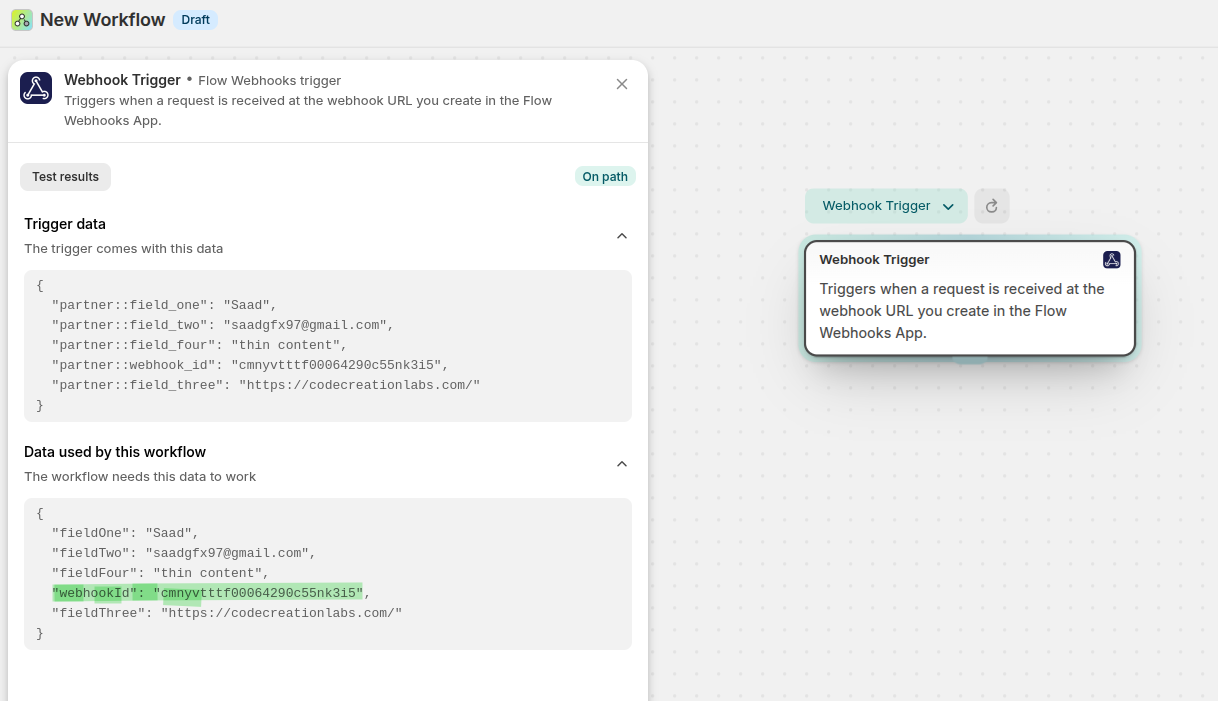
You can see the same webhook in the webhook dashboard and it can be used to identify your webhook.
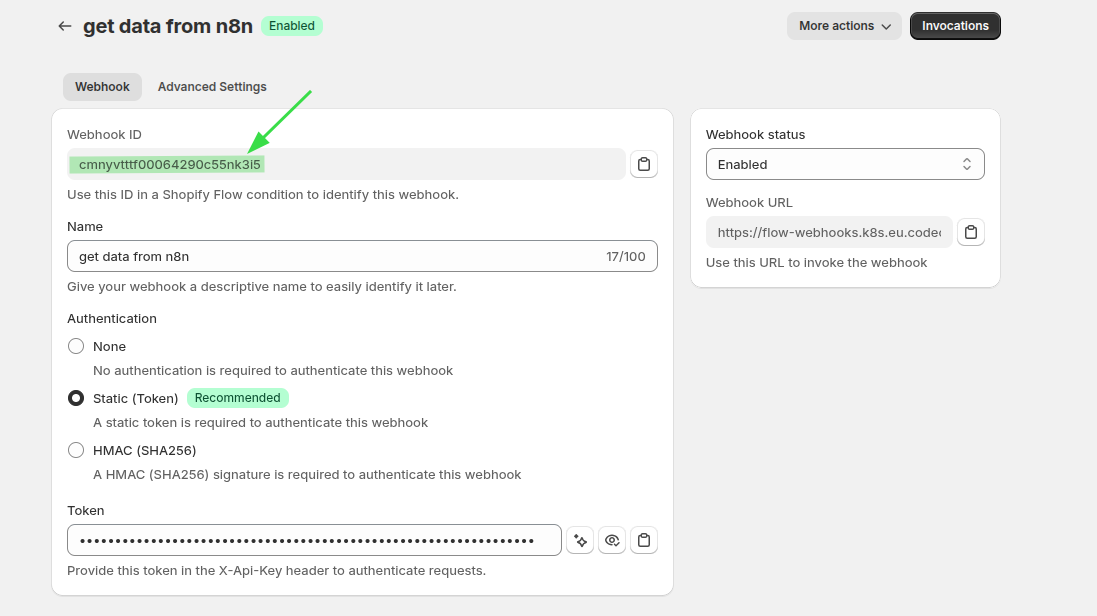
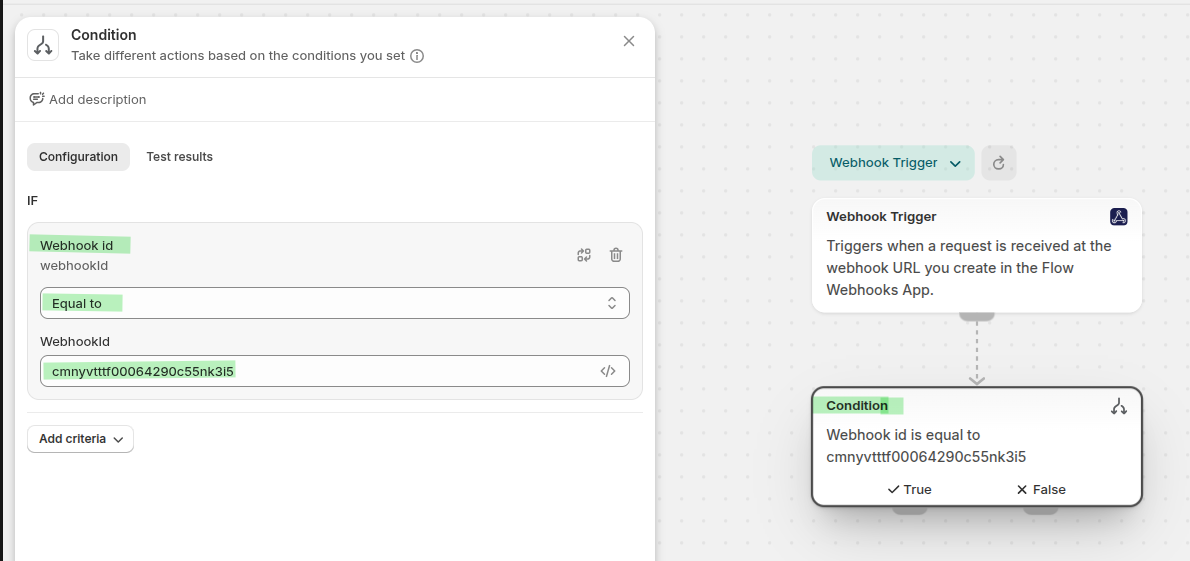
Now add the condition, if the received webhook id equals the webhook ID you created for MAKE flow then perform actions related to the form. Because every Webhook trigger receives the data sent to any webhook url in the Flow Webhooks app and this ID will help you select the relevant data from the webhook for specific purpose.
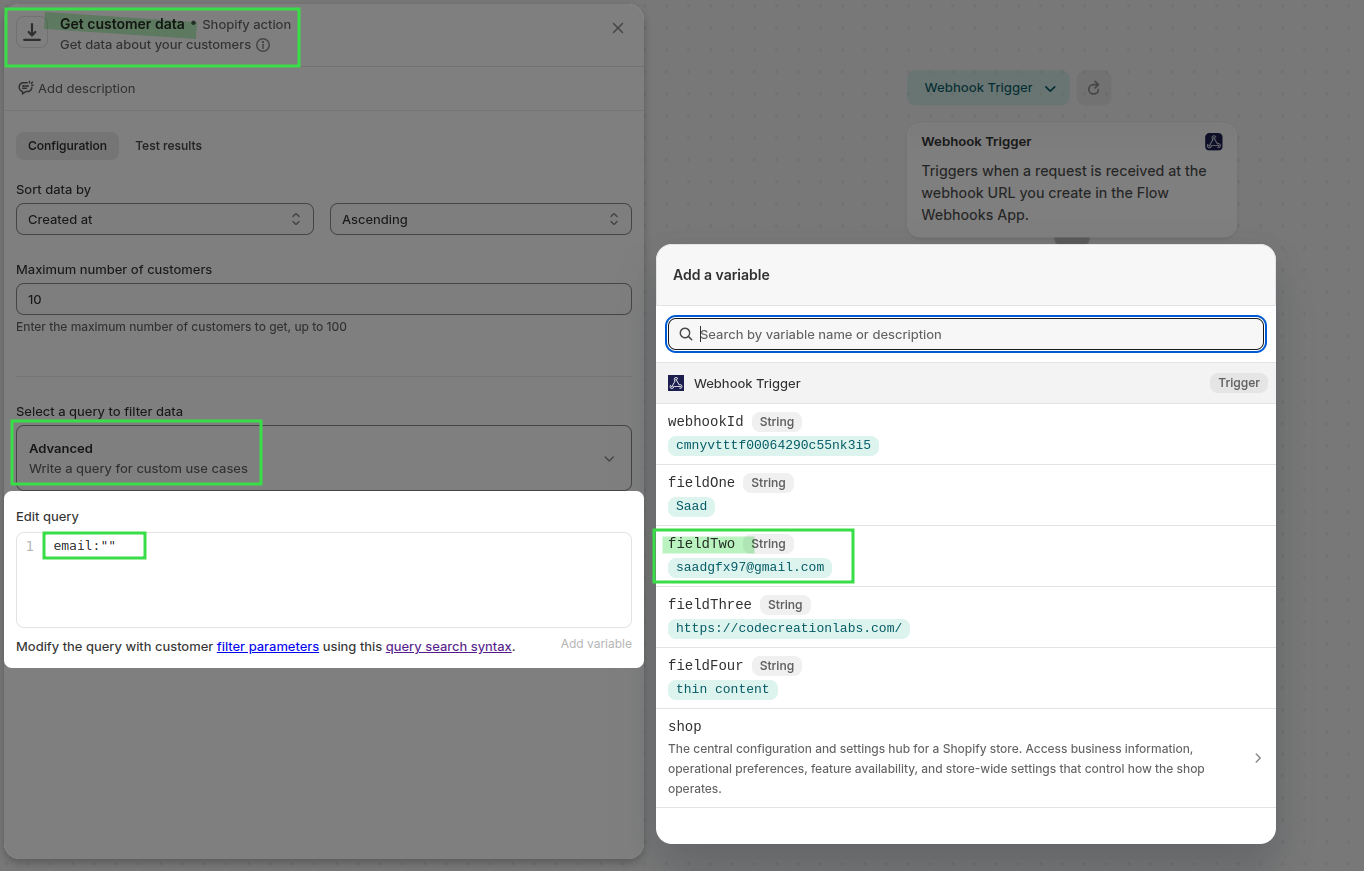
Use the Incoming email value to find the matching customer using Advanced query. In query you can use email and this email is recieved from the webhook trigger variables. For me fieldTwo is email. My query looks like this email:"{{fieldTwo}}"
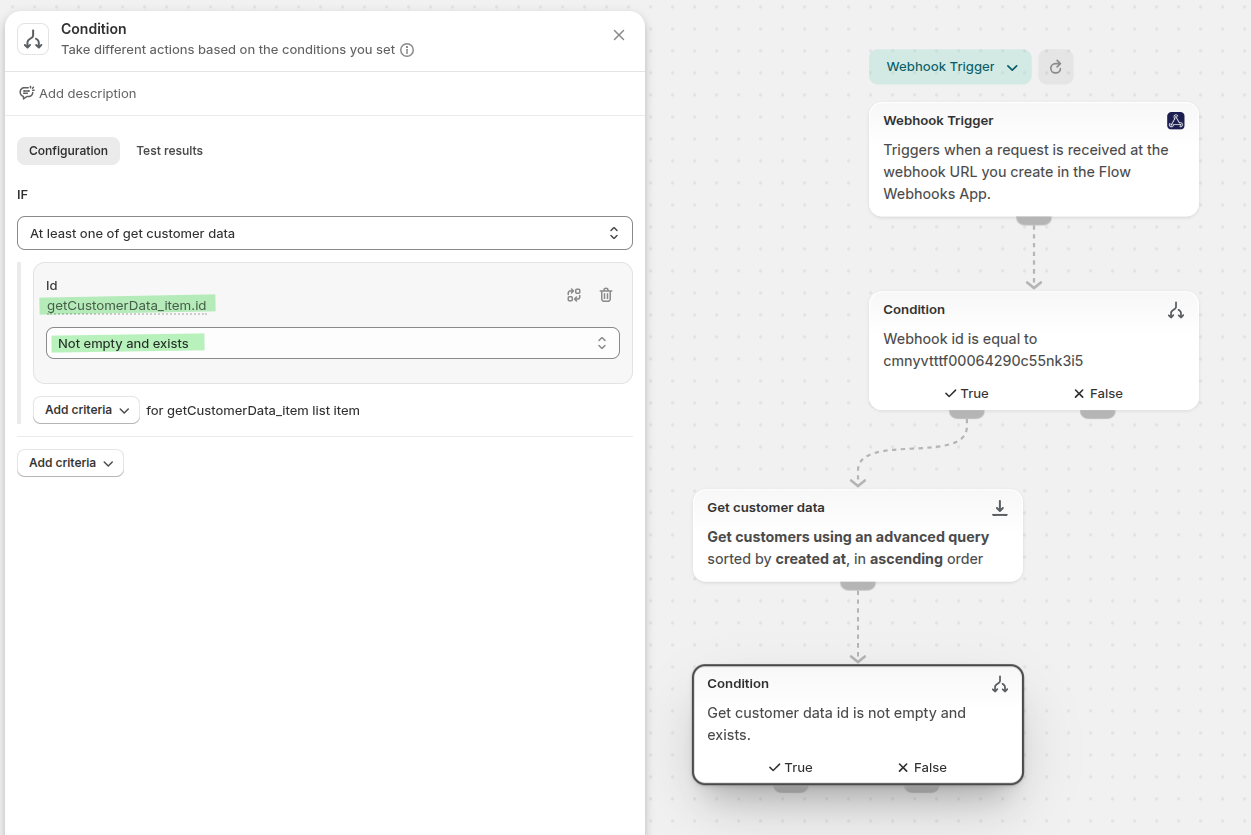
Now check if the customer exists. I am checking if the customer id exists.
then add the tag seo-audit-pending To get the customer, in the configuration, I have used this code to place the customer ID, I have used the white space control in the tag syntax {{-, -}}, {%-, and -%} to strip whitespace from the left or right side of customer ID. If there is some white space present, then query will not work.
{%- for getCustomerData_item in getCustomerData -%}
  {{-getCustomerData_item.id-}}
{%- endfor -%}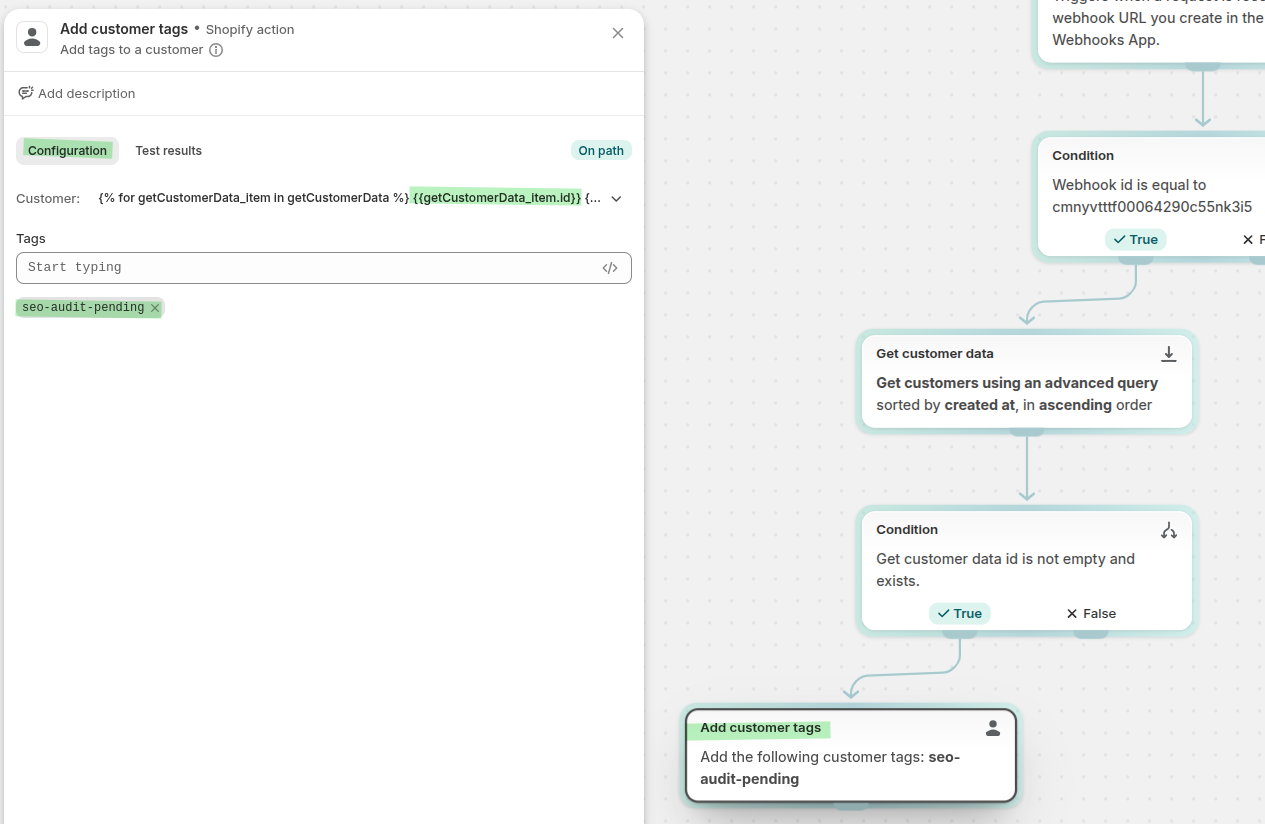
add or update the customer note with the store URL and SEO challenge. To get the customer, in the configuration, I have used this code to place the customer ID, I have used the white space control in the tag syntax {{-, -}}, {%-, and -%} to strip whitespace from the left or right side of customer ID. If there is some white space present, then query will not work.
{%- for getCustomerData_item in getCustomerData -%}
  {{-getCustomerData_item.id-}}
{%- endfor -%}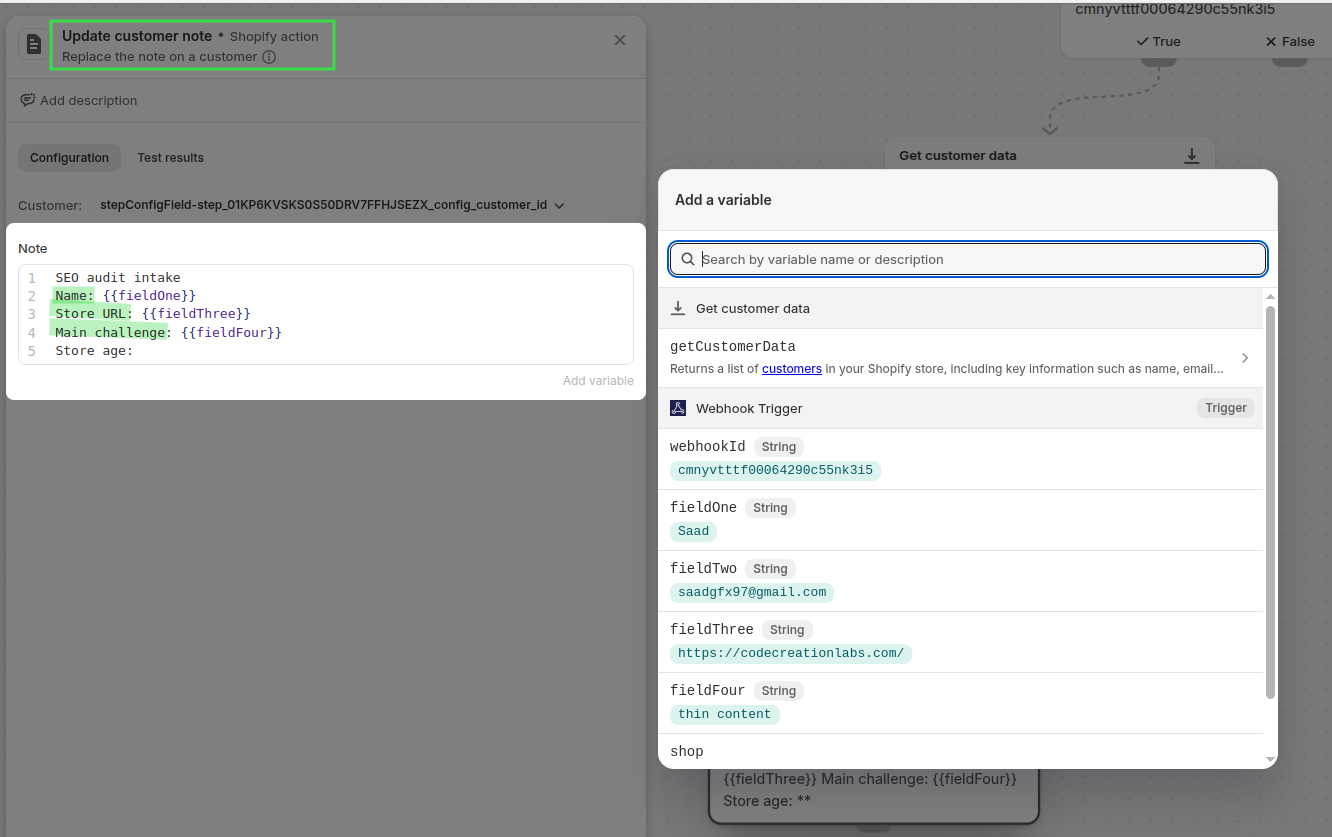
Turn on the workflow and submit a test response from your form and confirm that the correct customer record in Shopify receives the tag and note.
this works in this way, form submitted -> MAKE receives the data -> MAKE sends the data to flow webhook -> flow webhook triggers the shopify flow -> you filter the flow trigger based on webhook id -> then fetch the customer based on the id -> check if the customer is present -> add the tag -> add the note
The tag and the note looks as in the following image for the customer.